What Happens Behind the Walls During a Bathroom Remodel
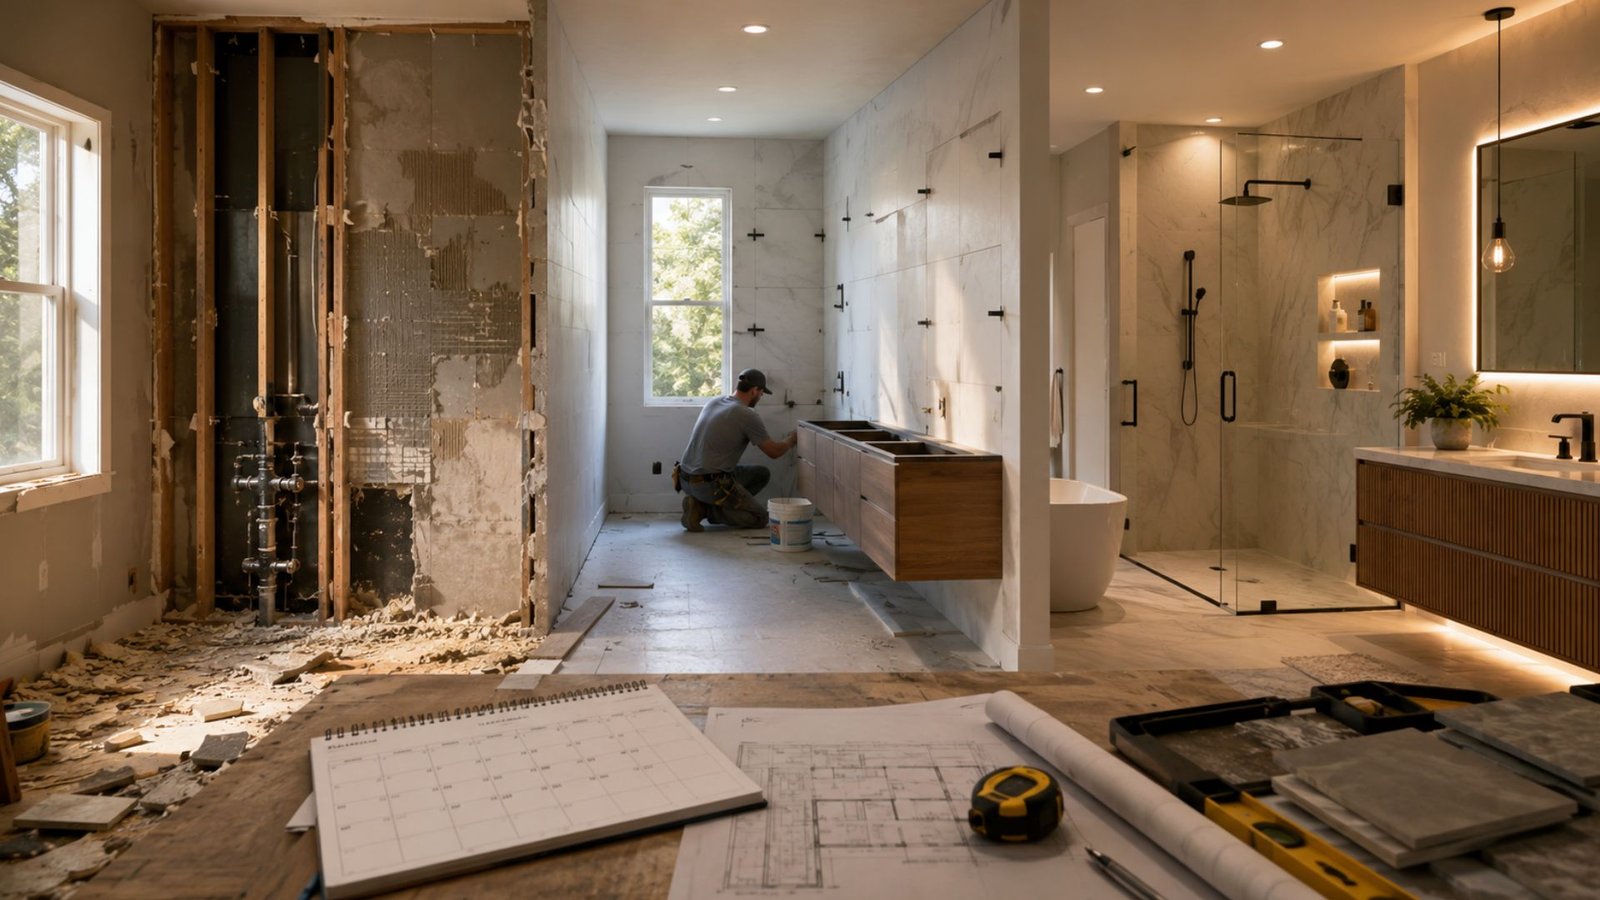
When a bathroom remodel is finished, everyone notices the new vanity, the tile, the glass shower and the lighting. What nobody sees is the work hidden behind the walls and under the floor. Yet those invisible layers decide whether the new bathroom stays beautiful for decades or starts showing stains, soft spots and musty smells within a few years.
Understanding what goes on behind the finishes helps you ask better questions, compare contractors more fairly and protect one of the most heavily used rooms in your home.
Demolition Reveals the Real Condition of the Room
Every bathroom remodel starts by removing old fixtures, tile and drywall. This stage often tells the true story of the room. Slow leaks around a toilet flange, a failed shower pan or a corroded drain line can quietly damage subfloors and framing for years without showing on the surface.
Once the walls and floor are open, a careful contractor inspects joists, studs and sheathing for rot, mold or insect damage. Any compromised material should be repaired or replaced before new work begins. Covering damaged structure with fresh tile only hides the problem until it returns, usually in a more expensive form.
Plumbing: Getting Supply and Drain Lines Right
A remodel is the best opportunity to update plumbing that may be decades old. Older homes sometimes still have galvanized steel supply pipes that narrow with mineral buildup over time, reducing water pressure and eventually leaking. Replacing them with modern piping while the walls are open is far easier than doing it later.
Drain lines deserve equal attention. Proper slope, correct venting and secure connections prevent slow drains, gurgling sounds and sewer odors. If the layout is changing, such as moving a toilet, converting a tub to a walk-in shower or adding a second sink, drain and vent routes must be redesigned to meet code and work reliably.
Valves matter too. A pressure-balancing or thermostatic shower valve keeps water temperature steady when someone flushes a toilet elsewhere in the house, adding both comfort and safety. Shutoff valves for each fixture make future repairs much simpler.
Waterproofing: The Layer That Protects Everything
Tile and grout look solid, but they are not waterproof on their own. Water passes through grout lines and tiny cracks over time, which is why the waterproofing beneath the surface is so important.
In showers, that protection usually comes from a membrane system applied over the backer board or from waterproof board systems with sealed seams. The shower floor needs a correctly sloped pan so water flows to the drain rather than pooling beneath the tile. Corners, niches, benches and valve penetrations are the most vulnerable spots and need careful sealing.
Floors in wet areas benefit from waterproofing as well, especially around tubs and toilets. A properly detailed system keeps splashes, overflows and everyday moisture from reaching the subfloor.
Ventilation: Controlling Moisture in the Air
Even with perfect waterproofing, a bathroom produces a lot of humidity. Without good ventilation, that moisture condenses on walls, ceilings and windows, leading to peeling paint, mildew and eventually damage inside wall cavities.
An exhaust fan sized for the room and vented to the outdoors, not into the attic, is essential. Quiet fans encourage people to actually use them, and humidity-sensing or timer controls make sure they run long enough to clear the air after a shower. Ductwork should be short, sealed and insulated where it passes through cold spaces to prevent condensation inside the duct.
Electrical Updates for Safety and Function
Bathrooms combine water and electricity, so electrical work must meet strict safety standards. Ground-fault protected outlets are required near sinks and wet areas. A remodel is also the time to add circuits for heated floors, towel warmers, lighted mirrors or additional outlets for everyday grooming tools.
Lighting design happens behind the walls too. Recessed fixtures rated for damp locations, vanity lights positioned to reduce shadows and dimmer controls all depend on wiring placed before drywall goes up.
Subfloor and Framing Prep for Lasting Finishes
Tile is rigid, and it doesn’t forgive movement. If the floor flexes, grout cracks and tiles loosen. Reinforcing joists, adding a solid subfloor and using an uncoupling or backer layer creates a stable base that keeps tile intact.
Walls need preparation as well. Adding blocking between studs before closing walls makes it easy to install grab bars, wall-hung vanities, heavy mirrors or floating shelves securely. Even if you don’t need grab bars today, planning blocking for them adds flexibility for the future.
Why Experience Matters for Hidden Work
Because these layers disappear once the finishes go in, it’s difficult for homeowners to judge quality after the fact. That makes choosing the right team especially important. Ask contractors how they handle waterproofing, what ventilation they recommend, how they deal with damage found during demolition and whether they update plumbing as part of the project.
In regions with damp climates and many older homes, such as the Pacific Northwest, a skilled Seattle bathroom remodeling contractor will treat moisture control as a priority from the start, combining sound plumbing, reliable waterproofing and effective ventilation so the new space holds up to daily use.
A Bathroom Built to Last
The finishes are what you see every morning, but the hidden systems are what keep the room healthy, safe and durable. When plumbing is updated, waterproofing is complete, ventilation is effective and the structure is solid, your new bathroom will look great on day one and still perform beautifully years later. Ask about what happens behind the walls, and you’ll know exactly what you’re paying for.